I finished my sample of my first 18th century quilted pocket designs, so I’m using pictures from the process to write a tutorial that will be helpful for anyone making one.
Suggested tools and supplies for hand-quilting :
- 8-10” wooden hoop, small scroll frame, or small slate frame
- small sewing scissors
- chalk pencil or disappearing ink pen
- sharp-point hand-sewing needles
- lightweight silk or cotton fabric
- thin wool even-weave fabric (flannel, suiting, shalloon)
- cotton or linen fabric for the back of the pocket
- thin wool batting
- 50wt silk thread in a similar color to the silk top fabric
- basting thread


Transfer the pattern to your top or fashion fabric using your preferred method.


Pagannini’s needlework pattern book from 1532 illustrates various means: tracing with back-light from a window or a candle, pricking the pattern with an awl and pouncing it with chalk or charcoal, and copying by eye.[1]

Sandwich the wool batting between your marked fabric and the piece of wool fabric.
Use very large basting stitches through all three layers. Start with a vertical row and a horizontal row that cross in the middle of the piece, then move 3-4” out to each side for the next rows, making a rough grid.

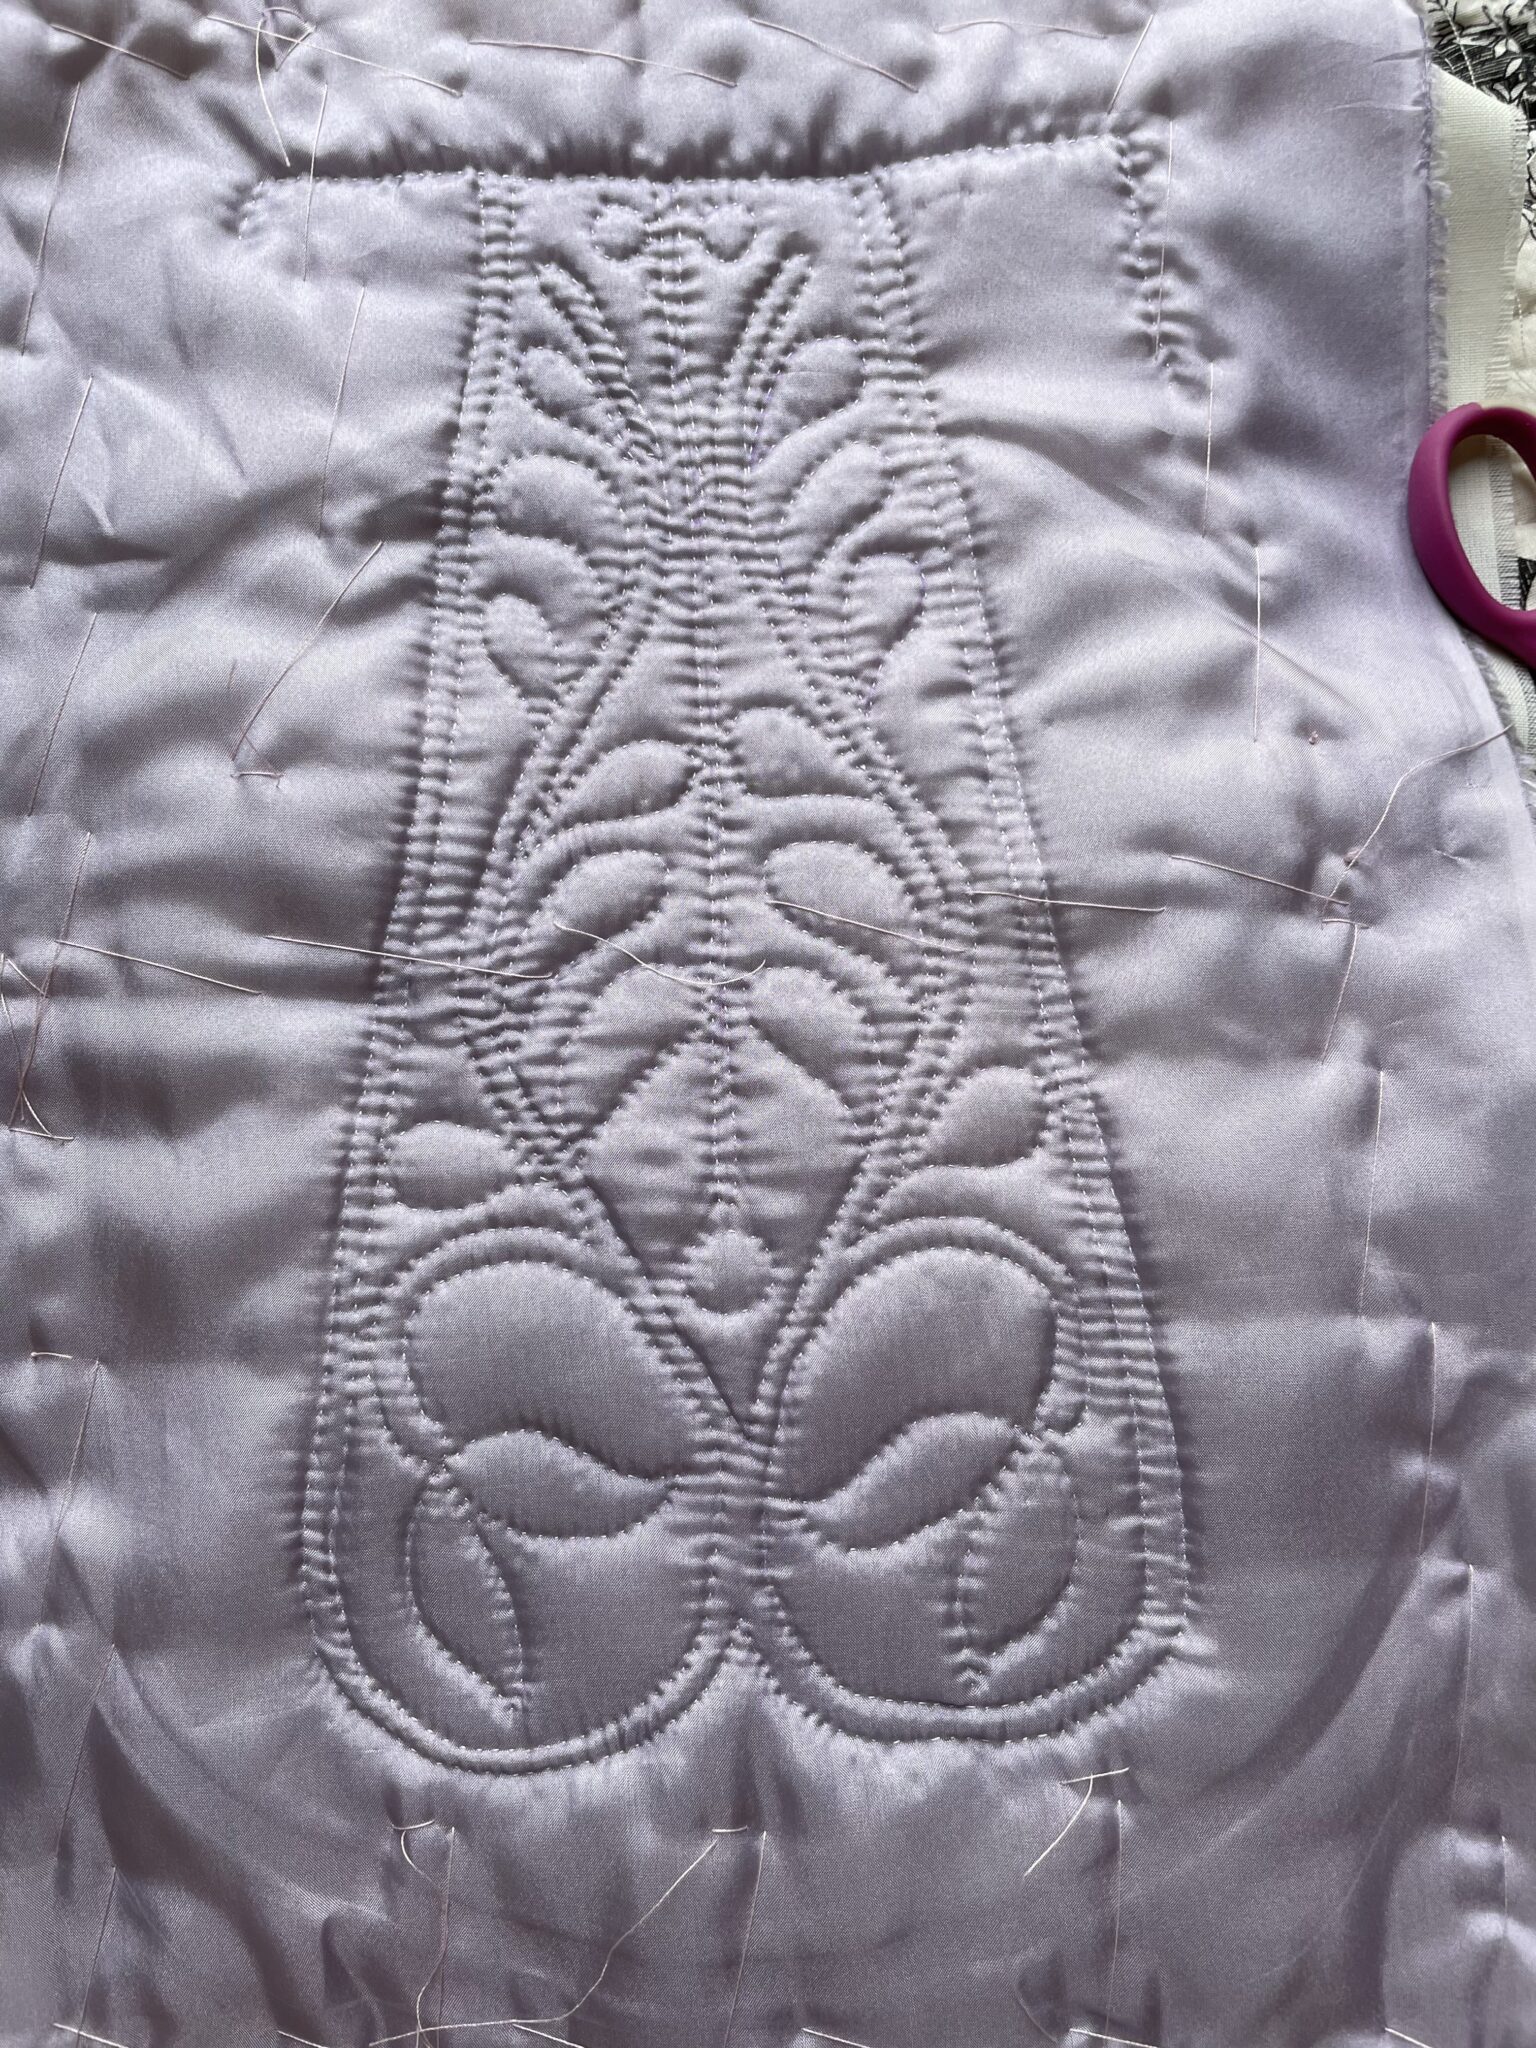
Next, follow the pattern lines with small running stitches to quilt the layers together. This can be done loose “in the hand” or using an embroidery hoop. In-the-hand will give a result with more loft between the quilted areas, but the fabric will “shrink” more noticeably. Using a hoop will contribute to a flatter finish and less shifting of the layers.

Note: When starting a new thread, “pop” the knot through the backing fabric so it hides in-between the layers. To finish a thread, end at the back of the quilting and then take a couple of back stitches through the backing fabric only. Then run the needle between the layers a few inches before pulling the thread tight, so that when it is cut it retreats to in-between the layers.

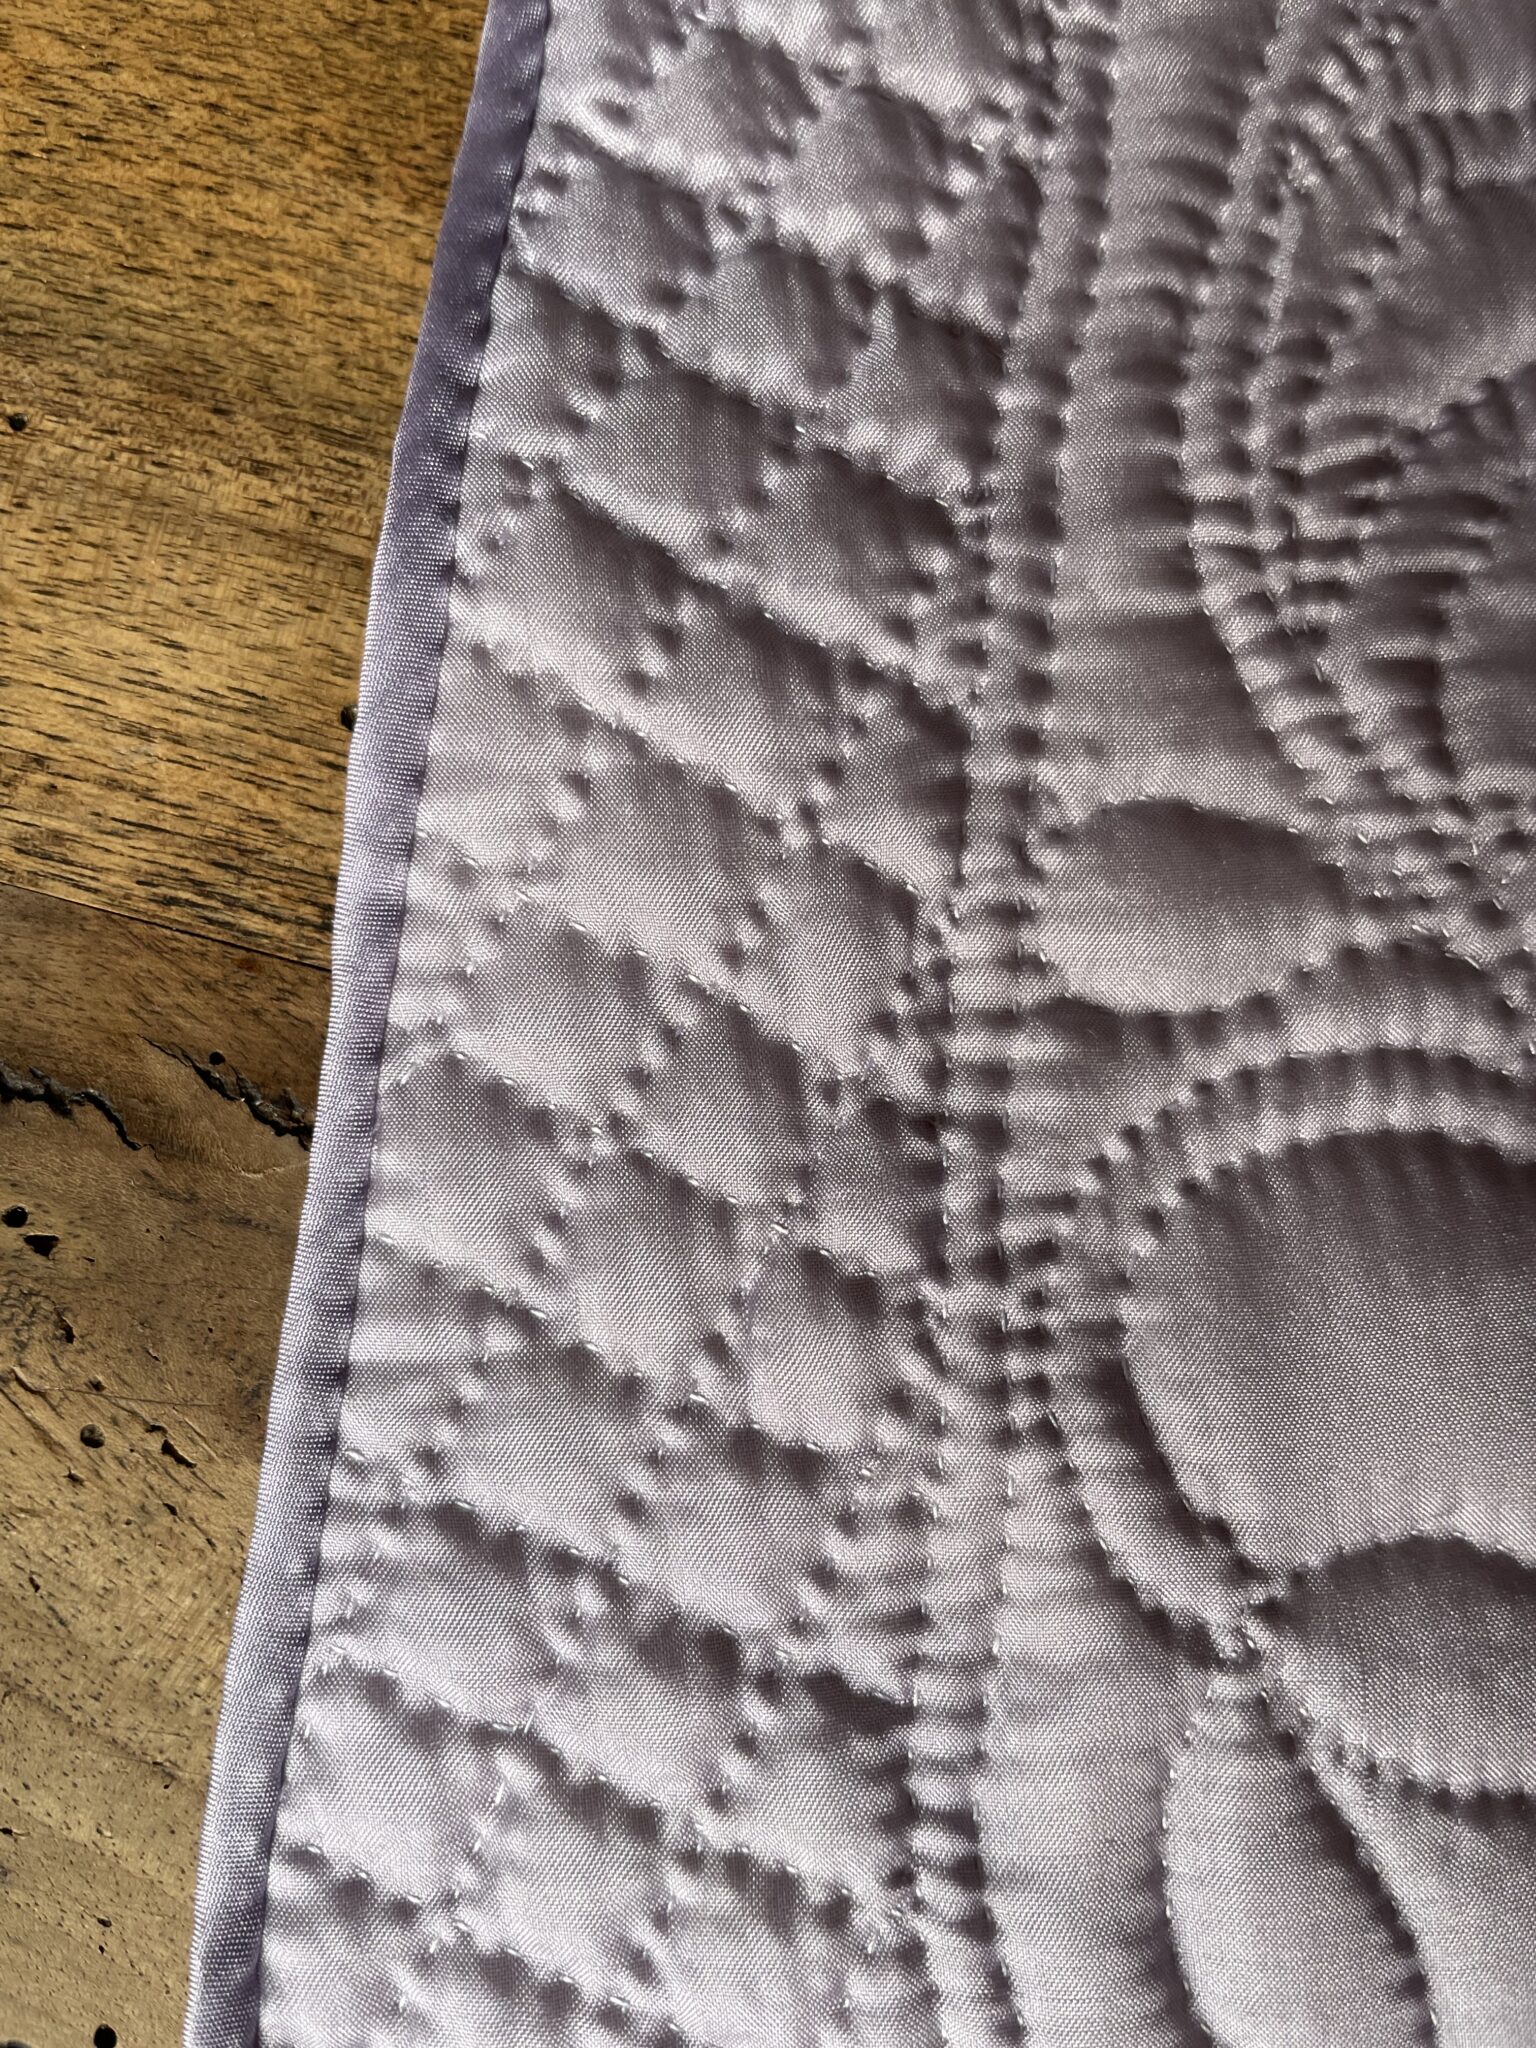
When finished quilting, run small stitches just inside the cutting line for the pocket shape (1/4”or less), and on each side of the line for the pocket-slit opening.
Cut out the quilted pocket shape, and another in the linen fabric. Cut the pocket slit open.


Then use the bias tape to finish the edges. (It’s easier to do before sewing on the back.)


Pin then sew the quilted pocket front and back wrong-sides together, on all sides with a ¼” seam allowance.
Leaving the top edge still unfinished, use bias tape to finish the pocket edges.


On the right side of the pocket, center the twill tape along the raw edge at the top, then pin and sew close to the lower edge of the tape.
Fold the top toward the back-side of the pocket, so the twill tape is now on the back; Press; Trim the top raw-edge enough that the twill tape covers it, then stitch the tape to the back-side without letting stitches go all the way through to the front.


The ends of the twill tape can be stitched or knotted to keep them from fraying.
Tie around the waist and enjoy using your new pocket!


Some of my related Pinterest boards:
[1] Allisandro Pagannini, Libro Quarto. De Rechami per Elquale Se Impara in Diuersi Modi Lordine E Il Modo De Recamare…Opera 1532, Digital image, Metropolitan Museum of Art (N.p., n.d. Web), 23 Apr 2014.
Leave a Reply